 |
Welcome! Club-sized, operations-based, layout without the club-sized problems! |
 A
Knoxville, TN area HO Model Railroad
A
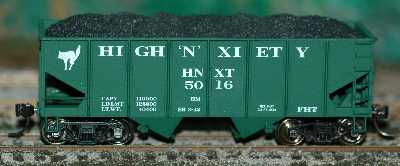
Knoxville, TN area HO Model RailroadListen to your wife. "Go play with Allan's Trains!"About the High 'N' XietyJuly 19th, 2023 I have retired to Maryville, TN near Knoxville. The new railroad is being built in the 49' x 16'6" room over the garage. It will not be multilevel, so it will have less mainline with the intention that it be buildable in just a few years. I am also doing all the wiring from the front of the layout rather than crawling under it. Click here as I chronicle the construction of the new model railroad, the Kudzu & Tennessee. In the meantime, check out the original High & Xiety that I built in Texas below. See my
first YouTube video,
"Meet at Delano Siding" As
of September 18th, 2016, there are now thirteen videos. High
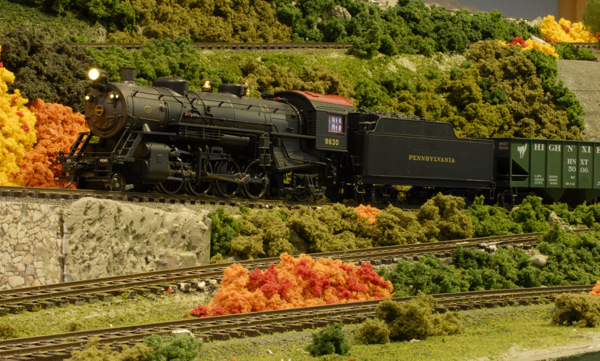
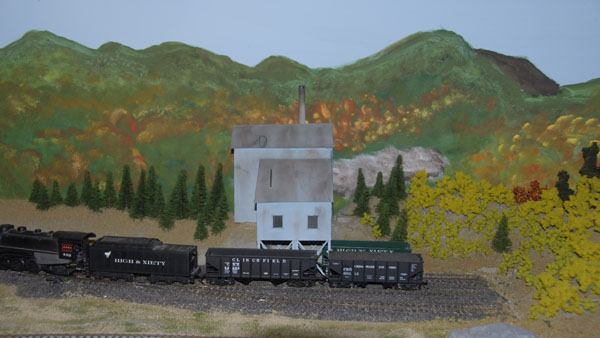
& Xiety Channel on YouTube. If you want to see some other cool model railroad pictures, be sure to check out the pictures of our garden railway! The layout is dismantled and a new one is being built in the Knoxville, TN area in Maryville. The Clinch River is 12 feet long as it runs along Delano Siding. As I had hoped, it is become one of the most scenic areas of the layout. We have added a moonshine run along with police and flashing lights to the layout recently. We also have a raging fire along with lights and sound effects. In fact, we have added lots of sound effects like babbling brooks and sensor triggered flange squeeling. Scenery has been growing in Haysi and Bear Wallar Hollar. Come see all that we have accomplished during the past year during the show!
December 27, 2013: The late Jack Wollschlaeger scratch built this model from photos of the Clinchfield company store in Trammel, VA. Note to self: When building a model railroad, give some thought of where a tripod and lights can go so that photos can be taken that are in complete focus.
Jack also built this craftsman kit of the Wollschlaeger Furniture Company.
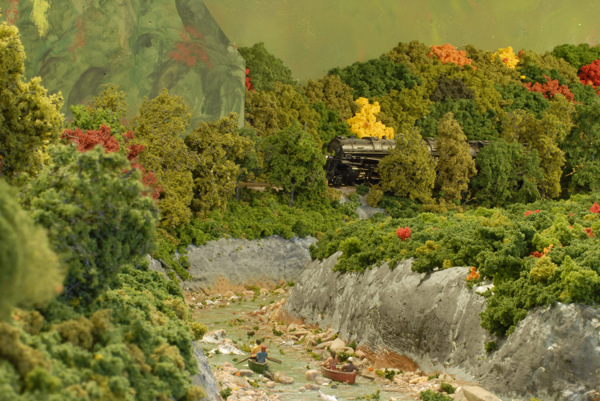
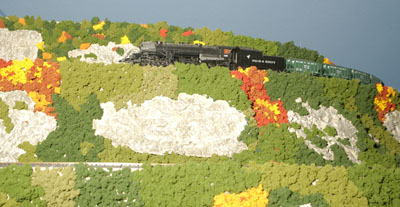
January 2012: The scenic Clinch River running along Delano Siding. Canoeist enjoy a leisurely trip down the river and are treated to the sight of a big articulated locomotive and unit coal train.
January 2012: The Clinch River is also enjoyed by fisherman.
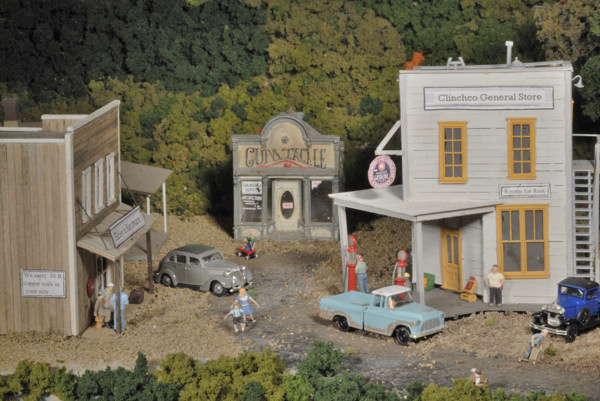
Clinchco, January 14th, 2011
January 2012: Along the Clinch River is a cock fighting farm. I stumbled upon one of these in the '90s. I'm sure my presence would not have been welcome. So the only picture I got of the cages was a mental one. It does include scale roosters. Yes, you can buy scale roosters!
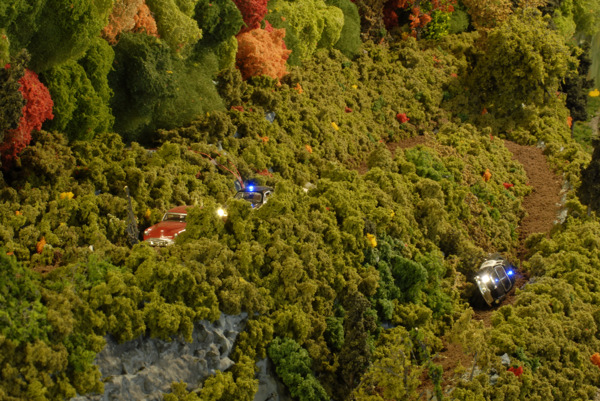
January 2012: Police chase a moonshine runner on a winding mountain road. One of the police cars looses control and rolls down the mountain side. I have actually seen a police car on its side in a ditch with its lights going and everything - proof that there is a protype for everything!
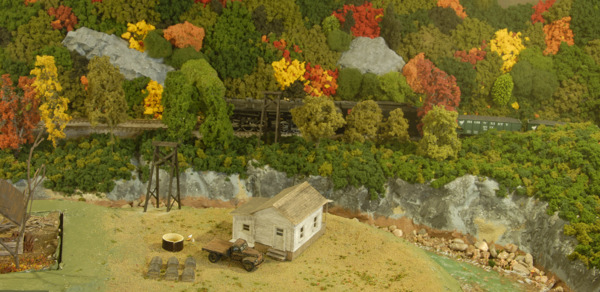
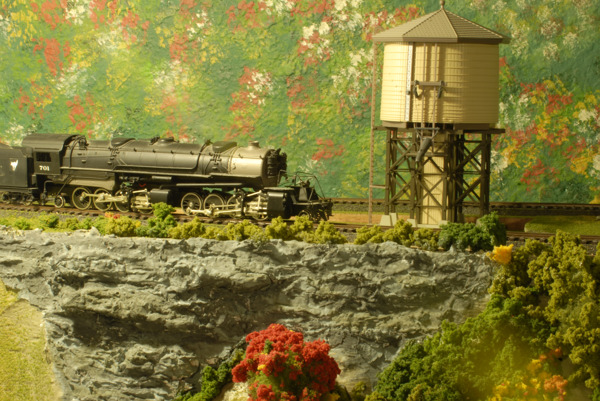
January 2012: A train pulls up to a tank for water near Fremont Jct.
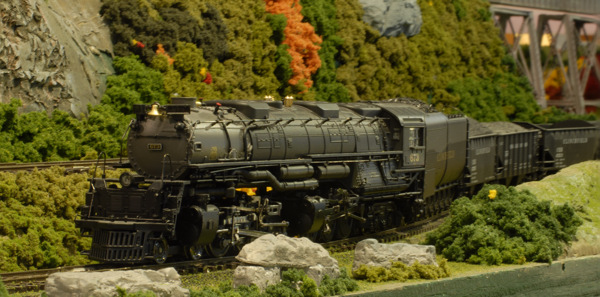
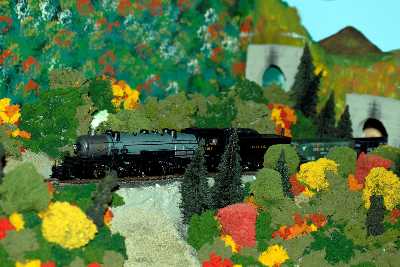
January 2012: A drag freight passes by Bear "Wallar Hollar". This is the first time I used software called Helicon Focus to fight the problem of narrow depth of field in close-up pictures. It seems to have done a great job.
January 2012: Here a train heads up the switch back of Bear Wallar Hollar.
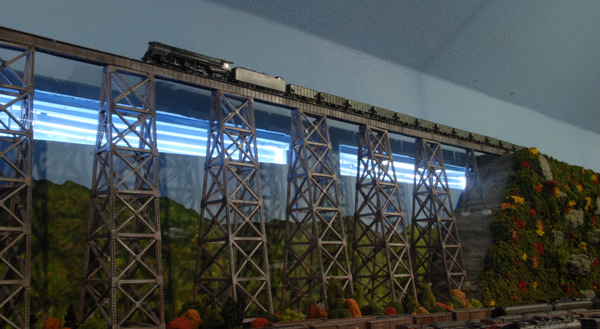
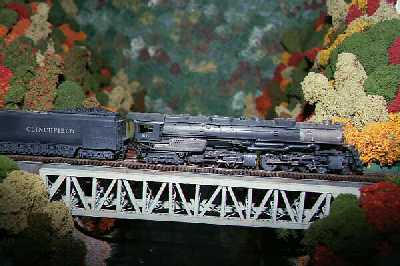
January 2012: The 81" long x 23" high Copper Creek Viaduct
January 2012: Legend has it that a passenger on the Clinchfield saw a little girl along the tracks and asked her where the trail went. "It goes to my daddy's still, but it doesn't come back." The Clinchfield was moonshine country. Can you find the still nestled into the vast forests of the High & Xiety? Trust me; it is right out in the open. Good luck in finding it!
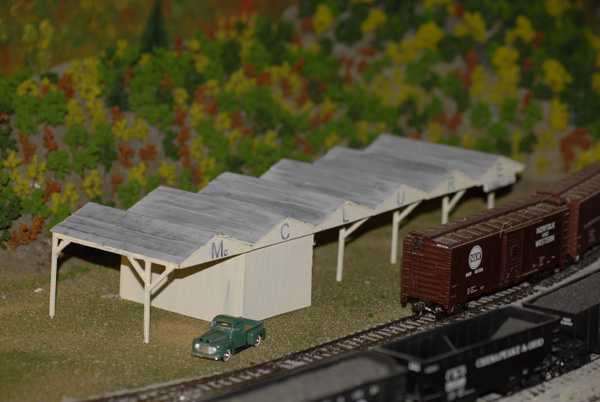
February, 2009: Jack Wollschlaeger completes the McClure woodshed made from a photo of the actual shed in McClure circa 1990. Now we just need to add some piles of wood and other details!
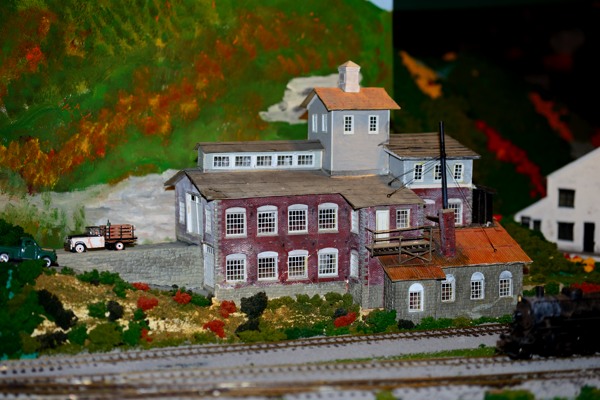
June, 2008: Tarpon Mine
June, 2008: McClure Mine. Not done, but starting to look like something!
The "Frankentrain" - Our joke steam locomotive that looks like a diseasel. When you stop laughing, check out this real-life combination steam and diesel locomotive made by Kitson-Still in 1928 to utilize the high starting torque of a steam locomotive and the efficency of a diesel. Since you have never heard of it, you can probably guess it was not a success. The railroad occupies the entire second floor of my home - over 1100 square feet!
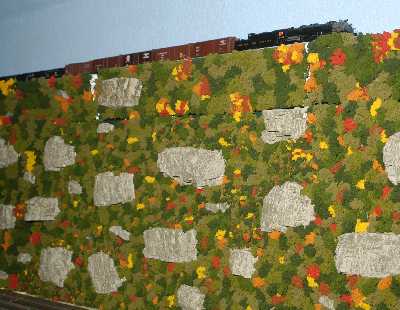
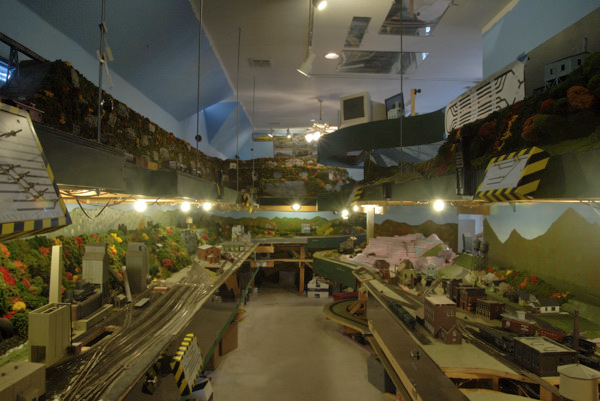
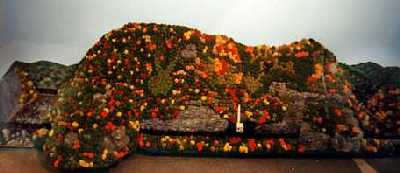
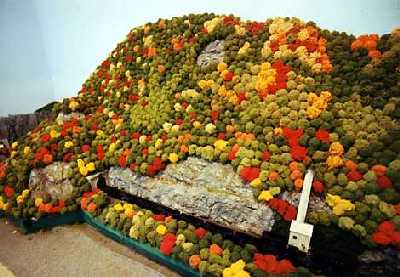
January 2012: This isn't the whole layout, but this is all that will fit in one photograph. . Scenery is slowly making its way across the High & Xiety. Level 3 is the unscenic'ed third level on the upper right. It is above everyone's head. Mirrors on the ceiling and a JMRI computer monitor helps manage it's 8 track, double ended yard with a balloon track at the far end. To the left is the highline. Dante Yard is to the left on level 2. Bear Wallow Hollar is across from it on the right. In the far back of the photo are the Loops that get a train up from level 2 to level 3. Below Bear Wallow Hollar is level 1. Under level 1 you can just see a portion of level 0 as trains come up from the floor and Breaks Gorge.
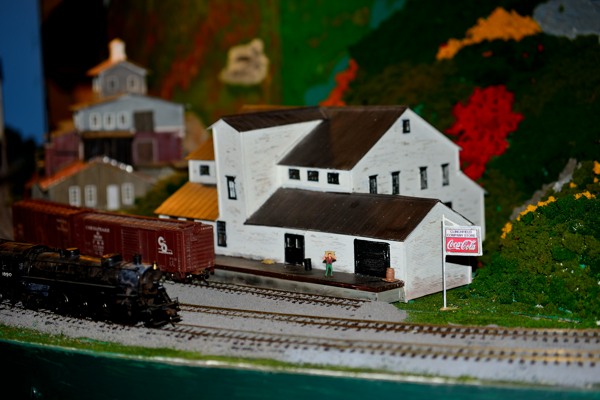
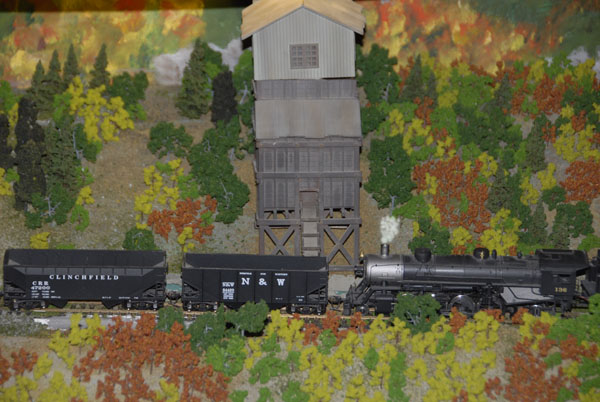
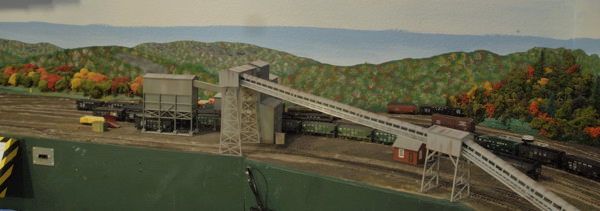
January 2012: Moss coal cleaning facility - right half.
January 2012: Moss coal cleaning facility - left half. Creating the Signature Look
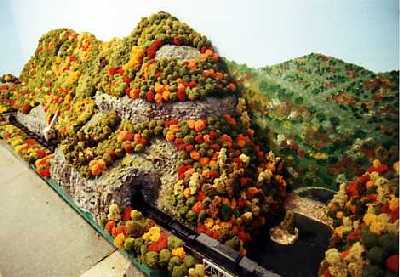
The Loops serve a unique function on the High & Xiety. They are a creative alternative to a helix. So unlike a helix, you can see your train as it progresses. Also, unlike a helix, it is scenic'ed. So rather than be an eyesore you try to hide, this little bit of trackwork is a Kodak moment that raises the train 24"! How cool is that?!
Operations
The Clinchfield had a single track mainline. We have included five passing sidings. Given that the railroad will be about 450' from end to end, with sometimes 150' between levels, the passing sidings will be as essential as in real life to keep from choking traffic. Trackside Tour - Construction of the HNXT
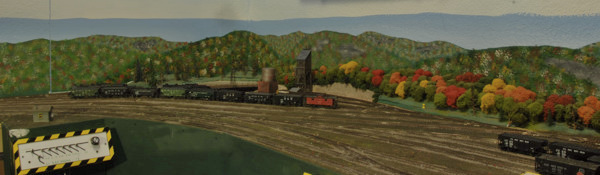
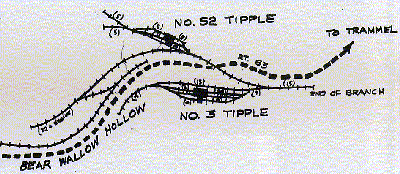
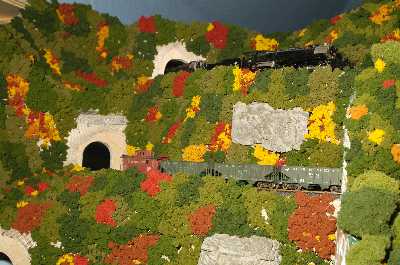
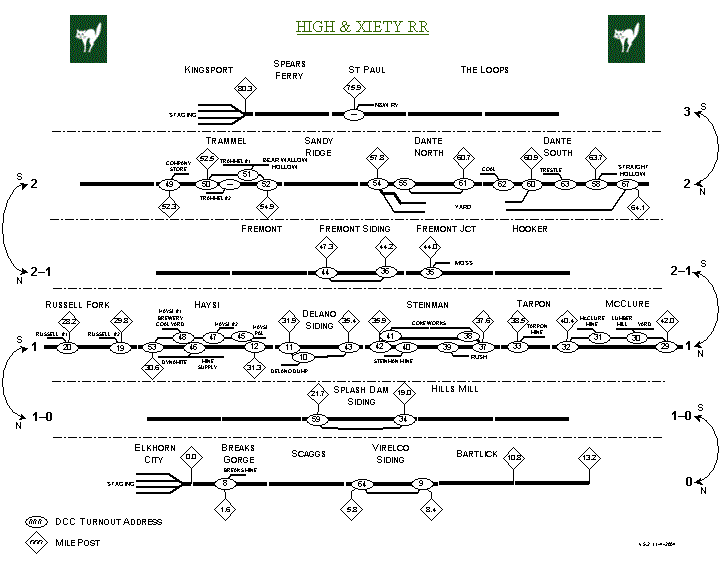
Click here for the HNXT Mainline Track Diagram Trivia question: How many rabbits do you see in the above picture? One? Some railroads have hidden Santas, Elvis, and even Jimmy Hoffa. This one has rabbits. The railroad is covered in them and more are being added as construction continues. Be sure to look for them when you visit. Don't be mad if you leave without finding them. This isn't a game for wusses! You can practice on the above photos. There are three. Coal is brought into Dante on the second level (Pronounced Dant or Daint by the non-Italian residents. Dante was an Italian cook when the railroad was built.). Here a turntable and two double-ended yards are placed end-to-end so that trains can cross the scale. Dante is a very busy place. Southbound trains from Dante go through the "Loops" for a final spectacular exit on a high mountain side and then across Copper Creek Viaduct - just like the prototype! - to the final hidden storage yard. The operator will be looking upward at the train as it leaves just as railfans do today. Computer-aided Model RailroadingWe now have five, yes five, monitors configured as a virtual control panel. Be sure to take this little picture tour of Clinchfield Country! |


