|
||||
|
Soldering Tips
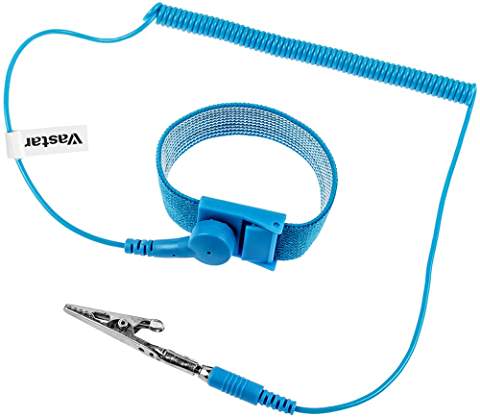
Use Soldering Equipment on DCC Electronics (DCC Safe Soldering Equipment) DCC electronics can be damaged by electrostatic discharge (ESD). Soldering equipment can generate stray voltages and currents that can also damage DCC electronics whether it be a decoder, boosters, block detectors, electronic circuit breakers or any other DCC device that is connected to the wires or electronics you are soldering. Below I've listed some of the solder equipment you may want to use, what to use it for, and the DCC electronics hazard you need to be aware of. ESD Safe Soldering Irons: If you have one that claims to be ESD safe, great. If you don't, don't panic. The key thing is that it be grounded. You can check that. Even if it claims to be ESD safe, you should periodically check that the ground connection is good. Do this at least once a year. Ideally, do it every few weeks. A little bit about ESD. Truly ESD safe devices are made from materials that don't build up static electricity or even dissipate static charges. Yes, there are plastics that can do this. To dissipate ESD, these specialized plastics must connected to an earth ground. You and your clothes can also build up static electricity - just walk across a carpet and touch a door knob. But attaching a wire directly between you and the ground is a potential shock hazard if you are around any energized equipment; which includes your soldering device. ESD wrist straps have a resistor in them that eliminates the severe shock hazard. For more on ESD, check out https://dccwiki.com/ESD.
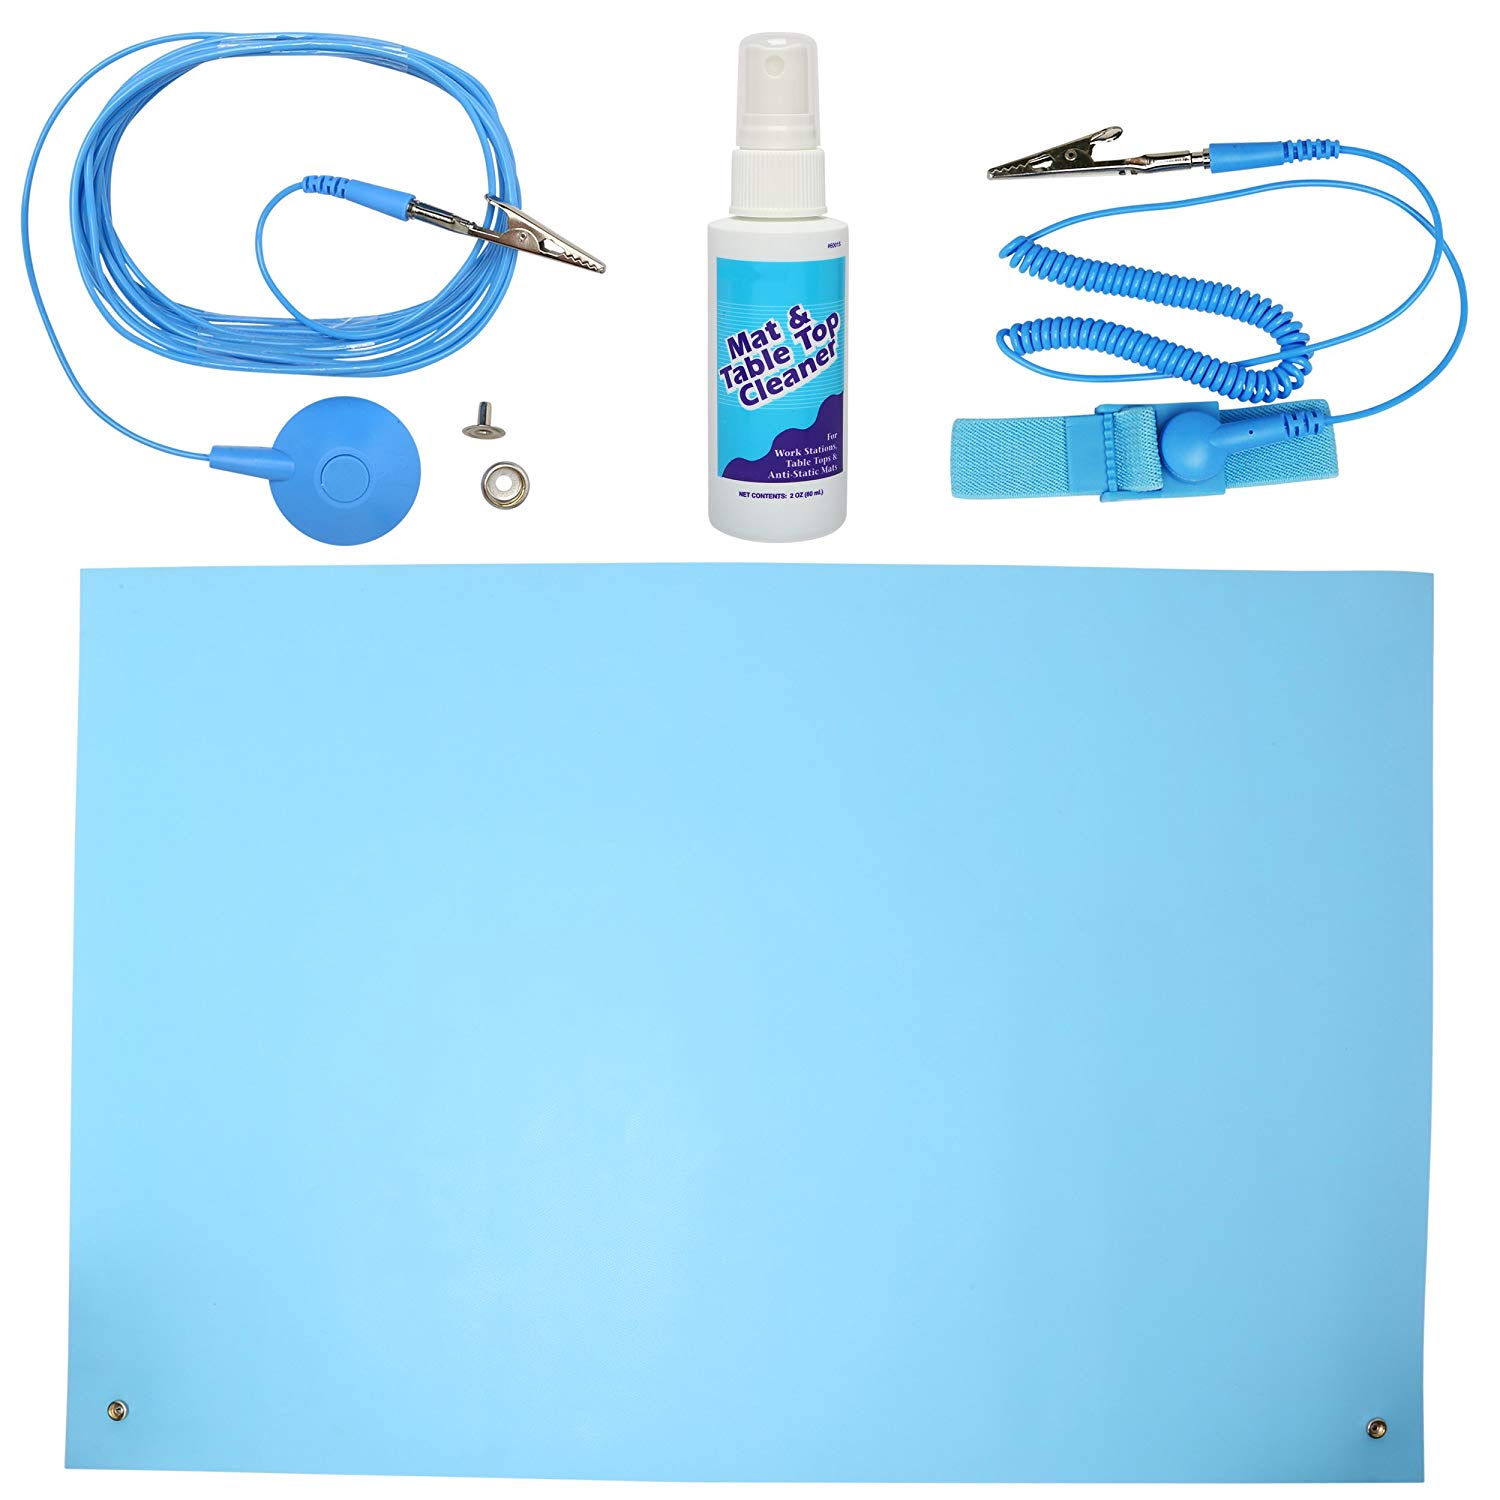
You can get an ESD wrist strap from Amazon.com. Is there anything they don't sell??? They also sell ESD workstation kits for about $40 (pictured above). If you have a soldering iron with a third (ground) prong, that's a good sign. With your soldering iron unplugged and cold, set your digital voltmeter to it's lowest resistance measurement range, typically 200 or 2k-ohms. Check for a low reading of a couple of ohms or less between the soldering tip and the third prong of the plug. Note: Digital ohm meters never read zero ohms even when you touch the meter's probes together. This is normal.
One could argue that the third prong of the plug may not touch the wall socket properly. That is true. But I don't recommend that people stick a test probe into a wall socket unless you are completely confident you know what you are doing. A severe or fatal shock hazard is present. Ungrounded soldering iron: If your soldering iron does not have a third prong on its plug, do not use for soldering to decoders or other electronics. If you unplug your decoder's harness, you can use this iron to solder the harness' wires. Also, do not solder wires to your track if you have any DCC electronics connected to it. Grounded soldering iron: See above for ESD safe soldering irons and follow those instructions. After confirming that the soldering iron has a good ground connection to it's tip, you can use it on decoders. DO NOT use this iron for soldering feeders to your track or bus wires if your DCC system is energized. You could damage your booster. Soldering gun: These devices pass a low voltage, high current through its tip to generate heat. Do not use on decoders. If used to solder track feeders, do not do while your DCC system is energized. It is wise to disconnect your track from your booster. Resistance soldering station: These devices pass a low voltage, high current through its tip to generate heat. Do not use on decoders. If used to solder track feeders, do not do while your DCC system is energized. It is wise to disconnect your track from your booster. Soldering to Pre-Weathered Track Soldering to Dirty Track.Soldering to Enameled Wire.The Metals to Be Soldered Absolutely, Positively, MUST Be Clean to Be Soldered.No Exceptions Whatsoever!I wish there was a way around this, but it is a law of physics - soldering is a process of bonding metals together. Not oxidation, corrosion, paint, other chemicals like chemical weathering, enamel — nothing but certain metals. I have never seen anyone who succeeded in violating any rule of physics. So save your energy; don't bother trying. If cutting through a wire, and the side of the wire is not the same color as the end, you must clean it. Use your Dremel wire brush, a file, sandpaper — anything but a torch. (The torch leaves burned residue behind — which is not a metal!) Copper wire should be clean like a new penny or the bottom of mom's favorite pot. (Yes, the one you ruined as a child. Thank god for Corningware!) Whatever metal you are trying to join, it MUST shine! You might also want to try using the liquid flux discussed below. It will shine copper wire right before your eyes without any filing or sanding. You might guess from this unusually laid out section that I'm trying hard to drive home a point. You are right. I am. There is simply no other way. Yet, people try anyway. I'm trying to do you a favor! You might think that the flux contained in solder is supposed to clean surfaces to be soldered. You are right. However, its cleaning power isn't as great as we would like it to be. Just think of it as microcleaning the surface. Dirt so small we can't see it. Okay, think of it as not cleaning a darn think at all! Whatever its cleaning power, by the time you apply enough of it, solder, and heat, you have a blob of solder, some of which landed on your leg and is causing excruciating pain right as we speak, has melted your track, and burned your fingers. I have been told some people have had some good luck applying flux paste from a can. You can try this before you attack your track with a Dremel wire brush. If you have found a way to violate any of the rules of physics, please let me know. We will be rich! Note: Weathered rail can still be difficult to solder to after you have cleaned it with a Dremel. Try liquid flux, you will be amazed! See the section below. How to Tell When You Have a Good Solder Joint. The solder joint should be shiny. If it has wrinkles, waves, frosted, or appears dull, you probably have a cold solder joint. If the wire is loose or wiggles, you definitely have a problem. If you tug on it — which you always do to test it — and it comes loose or apart, you don't have a good solder joint. Don't be afraid to tug on it. Now is a much better time for you to find out than during an operating session or show. Make Sure the Wire Has COMPLETELY Cooled Before Moving It. This can be difficult — especially if the wire is hot and your fingers are getting hot, too. But if the wire moves, you will get a cold solder joint. Electrical failure will eventually occur — probably very soon! The Tip of Your Soldering Iron Must Be Clean & Shiny. One of the reasons people have a hard time soldering, melting nearby plastic parts, and getting cold solder joints is because the tip of the soldering iron tip is not clean and shiny. A clean and shiny tip conducts heat best. Keep a damp sponge nearby and wipe the tip in it. You can use a wet paper towel, too. Rub the hot tip on your benchwork, if you dare. Do something (short of using your pants or even your tongue) to clean that tip whenever it needs it. Remember, if it is not shiny or you are having trouble getting the solder to melt, clean that tip! The Metals to Be Joined Must Have Good Mechanical Contact. Make sure the wire you are soldering is not "swinging in the breeze." "Crimp" it onto whatever you are soldering to so it will hold still. Failure to have a good mechanical connection causes two problems. 1) A cold solder joint is certain to occur. 2) You will have poor heat transfer. You will have to try to get the parts to solder together longer and you will melt nearby plastic parts. Work Quickly a.k.a. Don't Apply Any More Heat Than Necessary. Doing the above, that is, good mechanical contact and have a clean tip, are the most important things to ensuring you don't apply any more heat than necessary. Applying too much heat melts nearby plastic parts and your fingers. But once the solder flows over the work as you desire, remove the soldering iron and hold that wire still until the solder hardens and becomes shiny. Heat the Work, Not the Solder.It's tempting to heat the solder and get it melted and flowing. But if you don't heat the items that you intend to solder together, you will get a cold solder joint. Try to position the soldering iron tip so that it touches both things you are trying to solder at the same time. Then add the solder. Initially the solder won't melt. A few seconds may be necessary until everything heats up. Be careful! You will need to practice. Remember, do not apply any more heat than necessary. You will need to practice to get the knack. It is okay to apply a tiny amount of solder to the tip of the iron before you start. This helps the heat transfer. This will be fine where the two items to be soldered are irregular in shape and you are having trouble getting much of the surface area of the tip to make good contact. Use the Right Size Soldering Iron or Gun.Use a soldering iron of 25-35 watts to solder everything except bus wires, rail, or large switch solder tabs. Don't use anything large to install any decoders or any other electronics into your locomotives! Use a 150-250 watt gun to solder wires to buses, car tail light bulbs (read on), track, or large switch tabs. Using enough heat is important, too. These cases have a lot of metal to heat. Without enough heat, such as when using a 25 watt soldering iron, things will get hot, but not hot enough to melt solder — but probably enough to melt plastic parts or your fingers! Use a Resistance Soldering Station A resistance soldering station bears some resemblance to welding. While it is not actually welding, it does pass a low-voltage, high-current, through its tips and the work to be soldered. The high current causes the probe tips in particular to heat up. The primary reason for using a resistance soldering station is that the heat is localized. This is accomplished by applying a higher heat than you might with a standard soldering iron for a brief period of time. The solder flows before the overall temperature of the work rises too much. The bottom line is you can avoid melting ties or wheels! There are a few disadvantages, but you will happily deal with them to reap the benefits of using this type of soldering station. Ask anyone who has ever used one — they love it! For a demonstation of a resistance soldering station in action, click here: https://www/youtube.com/watch?v=4ORzu1Sg83o Make sure your sound is on. Note: I'm still not a great video producer, but I have improved the audio over first attempt. Notice I call it a station rather than an iron. This is one of the disadvantages. It consists of the soldering probes, a power pack that weighs several pounds, and a foot switch. Still, for soldering track, this thing can't be beat. I've used it for HO and G. It has never been easier to solder jumpers and feeders to both of these scales! It's also great for soldering to the steel tabs found inside of Athearn locomotives like the PA-1. This has never been easier, too! They come in several power level capabilities; typically 100W to 250W. If you are doing HO or smaller, 100 to 150W-175W will do. If you intend to solder O or G scale track, you will definitely need a 250W unit. If you are soldering metal cars or buildings, you should get the 250W unit. Two companies that modelers are familiar with are PBL, which carries the Hotip brand ,and Micro Mark, which carries the American Beauty brand. When comparing the offerings of these two companies, you might be wondering, "What kind of soldering tool is called American Beauty?" There is no need to be scared away by this seemingly unusual name. They have been a major soldering tool supplier for many years. So pick the one that suits you. The manual that came with mine touts the benefits of this "ultra high performance soldering" method and also warns that there is no way to know exactly what to set the power level to. They recommend trial and error. This would make you tend to think that it would be hard to learn to use it. I was smiling on the very first try! I generally start with a setting of 50% (125W). The whole soldering operation can be over in under 3 seconds, so if it does not start to go by then, I stop and crank up the power. You will find that you can get the hang of this thing quickly and a less than optimum setting doesn't spell disaster. Here is another neat benefit. The normal soldering probes consist of something that looks like electrified tweezers. So if you are soldering a wire to track, you squeeze the wire and track between the tweezer tips, holding the two items tightly together. And unlike using a pair of pliers or something to hold the wire to the rail, and having them suck away the heat, these supply the heat! As soon as the solder flows, take your foot of the switch. When it cools, release your grip on the tweezers. Even though they may have been in contact with the solder, you will find that the tweezers did not get soldered to the work. What more could you ask for? You will love it! If you have the bad habit of trying to solder without cleaning the work first, that habit will stop here! The reason is that this type of soldering works because of the flow of a low-voltage, high-current. Any dirt or oxidation introduces too much resistance for the necessary high-current to flow. Nothing will happen. It simply will not work. So you will have to keep the probe tips and your work (track, wheels, etc.) shiny clean. Keep a piece of 400 grit sand paper or an emory board (finger nail file) handy to clean the tip. You will probably need to clean the tip frequently, especially in the beginning. What's the other disadvantage? Unless you build one yourself, these things are not inexpensive. They range in price from $262 to about $600. The December 1997 issue of Garden Railways carries an article to build one from a battery charger and an old soldering iron handle. Should you want the electrified tweezers, you can buy them from one of the above. If you want to build your own tweezers, you will need to at least buy the copper clad, stainless steel tips. These are important to carry the power to the tip where the stainless steel heats up to do the soldering. See the section on Track Wiring, DCC in the Garden, and Block Detection for specific advice on how to use a resistance soldering station as it relates to these sections. If you do decide to get a resistance soldering station, be sure to wear safety glasses. Properly used, there are no sparks. However, if you hit the foot switch a moment sooner than when you have the tweezers ready, you will get a few. Whether you realize it or not, often sparks are really tiny bits of burning metal. There is no point in risking getting anything in your eyes! Use Liquid Flux for the Easiest, Neatest, Best Solder Joints You Have Ever Seen. Liquid flux is not as convenient as rosin core fluxes. Or so it would seem. H&N Electronics http://www.hnflux.com markets Supersafe flux which works as advertised. I have tried liquid fluxes before, but none impressed me enough to give up using rosin core solder until I came across this product. I use their "Number 30" liquid flux for tin/lead and tin/silver solders. Solder joints look great and are more quickly obtained. If you find soldering difficult, try this liquid flux. You are not left with a residue which contributes to cold solder joints. You will find the solder flows completely over your joint. Quicker soldering means less likelihood of melting ties. I use their gel, which is more like a syrup than a paste, for soldering to HO track. Just dip solid (no core) solder in the gel. The drop can then be applied to the side of the rail. You will find liquid flux makes it effortless to solder to the side of weathered rail. (Weathered rail can be hard to solder even after the weathering is removed with a Dremel.) When using liquid flux, do not use a rosin core flux. That defeats the advantages of using liquid flux. Use solid solder. H&N sells solid solder. Your local hardware store may also have it. It also can be ordered from places like Digikey and Mouser. Their liquid #30 flux works great for G nickel-silver and for attaching all feeders to buses. Go ahead and keep using rosin core flux to install decoders and other electronic work.
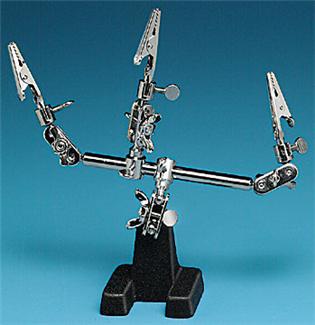
Do You Need a Third Hand?
Solder Selection Guide, Including Lead (Pb) Free Solder Solders traditionally contained lead. Lead eliminates the growth of tin whiskers; which can short out electronic circuits. Solder containing lead also melts at a much lower temperature than pure tin solder. Lead is a hazardous substance which countries around the world are trying to eliminate. Europe, China, and the United States all have initiatives that are in effect or will be. RoHS, Reduction of Hazardous Substances, is now in effect in Europe and companies around the world that want to sell there are changing the finishes on the leads of the components that they sell. Most companies are going to pure tin finishes, though other finishes like gold and Nickel/Palladium/Gold flash are also being implemented. What does this mean to you? What are your options? Because of tin whiskers, military and other high reliability industries like medical, are exempt from the pure tin requirements. I work in the military industry. So most of what I can tell you is because of this experience. DCC electronics that you buy today, regardless of what country you live it, probably contain electronic components that have pure tin finishes. Components with pure tin finishes can grow tin whiskers. There isn't anything you can do about this, but if you want to learn about tin whiskers go to my advanced section on the topic. As far as soldering decoder wires in locomotives and wires to track and buses, you have a few choices. You can use pure tin solder, continue using solder with at least 3% lead, use solders called "SAC" solders, or in the case of attaching wires to buses, using insulation displacement connectors (IDCs). Because pure tin melts at a significantly higher temperature, pure tin solder is not common. Perhaps your best choice it tin/silver solder. H&N sells tin/silver solder in hobbyist quantities (1 oz.). I use it and have good luck with it. While it does melt at a higher temperature than tin/lead, I found I didn't have to turn up the power on my resistance soldering station and like the tin/lead, it still melted fast. The solder selection guide shows some of the more common solders available. Pure tin clearly melts at a much higher temperature than tin/lead solder or SAC solder. In most cases, using pure tin solder will simply require more heat. If you have a temperature controlled soldering station, you will need to dial it up. Using pure tin solder probably won't be a big deal except when soldering to track where a higher temperature and more heat may mean melting ties. It could also be a problem when soldering to electronics due to the higher temperature required. Therefore, you will want to use something like SAC solder or continue using solder with lead.
There are a multitude of SAC solders available. SAC 305 is probably the most common. It contains 3% silver and 0.5% copper. Just in case you are wondering, SAC means Sn (tin), Ag (Silver), and Cu (Copper) per the periodic table. Tin whiskers do have the potential to short out your decoders and every other electronic product in your home. If you want to learn more about this microscopic menace, go to my advanced topics section.
Solder Selection Guide For the most part, all of the above solders can be used for all applications. So don't let the choices overwhelm you nor do you have to worry a lot if you intend to use a particular solder for an application not mentioned for that type. However, when you use the solder I have listed for the application I have posted, you will have the easiest time. That is what it is all about. The easiest time usually means you will have the fastest forming joint and therefore, no melted ties or damaged electronics. If you are going to be soldering something that uses "a lot" of solder, like a feeder to a bus, if you choose to use the smaller (.031") size solder, you will find that it will be a little bit hard to feed the amount of solder needed through your fingers. Harder, but not impossible. So if you are going to do a lot of particular kind of soldering, you should consider buying the solder I have listed for that application. For example, since I solder decoders and electronics, I have a roll of .031" rosin core solder. For soldering to track and feeders to buses, I use .031" solid core solder with liquid flux . You could decide that you want to solder feeders and buses as well as spade lugs, so you might want a roll of .062" rosin core solder, too. Conductive Epoxy Do you need a solder-like connection but can't risk melting ties and knocking rails out of gauge? Are you trying to attach a wire to the frog of a turnout like a Micro-Engineering one? Conductive (silver-bearing) epoxy may be for you! Before you read on, I do need to warn you that we found it didn't adhere well and easily came off the turnout.
Conductive epoxy with clamp holding wire in place while it hardens. It even looks like solder! Conductive epoxy has been around for years. I've never needed it until a friend told me he wanted to use Micro-Engineering turnouts. Micro-Engineering makes great looking turnouts with a cast frog. The challenge is attaching a wire to the frog without melting any ties and ruining its alignment. Time to try conductive epoxy! You can order conductive epoxy from Amazon. The epoxy is made by Atom Adhesives. www.AtomAdhesives.com. If you need any help, the Atoms Adhesives instructions say you can call them 24/7 at 888-522-6742. We bought the 5 gram kit. It was $11.99 plus shipping. We had six turnouts to do. As it was, we could probably have done 18; maybe more. There are larger and smaller kits available. You can buy the epoxy in syringes. Our 5 gram kit came in a package similar to the convenience packages that resturants use for ketchup and mustard. The package has two chambers - one with the epoxy resin and the other with the hardener. You squeeze the package and break down the barrier between the two chambers. You then mix the two chambers together. When done mixing, clip a corner off the package and start dispensing your epoxy. Before you start mixing your epoxy. Prep all your turnouts. We took a cutoff wheel and gently cleared the plastic off the back of the frog. (This will be evident if you are using Micro-Engineering turnouts.) We then prepped our wires. Strip both ends. For the end going to the frog, we used an alligator clamp to hold the wire in place. We found it necessary to put a small kink in the wire so that the clamp would apply a light pressure on the wire so that it would make contact with the frog. Get your turnouts ready and then mix your epoxy. Of course, the big question is whether the epoxy conducts well enough to handle DCC power. How much silver is in it? So two tests were in order. One, is the famous "quarter test." Would a booster shut down if there was a short on the frog? So we tried that and it worked. But wait, recall that we fixtured up the wires with the clamps to press the wire against the frog. So maybe the epoxy didn't really work. So I conducted a second test. This was a simple ohm check across a dab of epoxy and a thin line of epoxy. Good, it only read about an ohm both times. Now I feel better that we have something that will work. Conductive epoxy won't replace solder. Since it takes about 24 hours to cure, you will need to fixture your work for the duration. Fortunately, I had a number of alligator clips. But if I had more than six turnouts to do, even I would have run short on alligator clips. (Use medium or large alligator clips to get the jaws around the ties and rail. If you tried to alligator clip wires to the sides of your rails, you don't want to get the clips in the epoxy or you may find the clips permanently afixed to your rail. Recall that our objective was avoid melting ties when used on a short frog. When you solder to a longer piece of rail, the danger of the heat knocking the rail out of gauge is less. If you have a lot to do, buy several, smaller kits of the epoxy. You may want to buy an extra 2.5 gram kit in case you have to redo any joints. We apparently didn't get one of the wires epoxied properly and the wire came off. Now my friend is having to go buy a 2.5 gram kit for this one turnout. As I mentioned, you can also buy this epoxy in syringes. One advantage of the syringe approach is that you only need to mix what you need and you will have some left over to use in the future. But there are advantages of being able to buy small packages that have a perfect mixture ratio of hardener and resin. So give it some thought and do what best suits your needs. My friend is just now beginning his railroad and to string out his expenses, it will be some time before he power routes his frogs. So it will be a while before he knows if there are any issues with using the conductive epoxy. If you try it, let me know how it works for you. Invisible Feeder Joints by Peter B Herron There are probably as many different ways to attach feeders under your track as there are modelers who do it. Here is one way. I must emphasize how great a resistance soldering machine is! (See using a resistance soldering station on this webpage.) It’s not for everything as you’ll see. I solder all my feeder wires to the bottom of the rail, not the side, even if the track is ballasted. This method is so easy.
Now take a file shaped like the one in the picture below right by the hole in the roadbed to clean and scratch up the bottom of the rail for about 1/2”. This is the most IMPORTANT step in the whole process.
Next apply flux (See using liquid flux on this webpage.) to the cleaned area on the bottom of the rail with a toothpick. Bend the feeder into the shape below.
Now push the feeder wire down the hole until it is sitting like this.
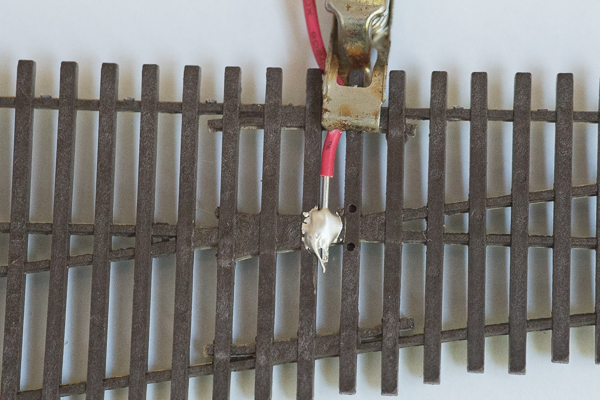
Here is where your resistance soldering tweezers shine. As you pull the wire down from underneath the roadbed that bend in the wire will let the angled end shift to under the rail. Now push it up and hit with high heat for 2 seconds and the solder on the wire will combine with the flux underneath the rail and form a solid joint. See below:
You certainly can use a conventional iron but the instant on and off of heat using resistance helps you to not affect plastic ties so much. |
|
|||||||||||||||||||||||||||||||||||||||||||||||||||||||||||||||||
Copyright by Allan Gartner 1996 - 2025 © All rights reserved. You may print this for your own, personal, non-commercial use. Non-commercial, non-personal reproduction may be requested by visiting www.WiringForDCC.com/writeme.htm . All users, commercial and non-commercial, may link only to this site at www.WiringForDCC.com. Thanks to all who contribute to this site and the Q&A forum! |

 If you continue to use solder with lead in it, you need to treat the solder as you would any other hazardous chemical in your home. If you have children, you should keep the solder locked up and out of their reach. You should not eat anything while using this solder and should wash your hands thoroughly when done. Use in a well ventilated area and wear a respirator if you can. I did find that the CDC National Institute of Occupational Safety and Health website does indicate that solder fumes contain lead. I am not an expert on all the health hazards of using lead solder or properly using it. I therefore recommend that you do NOT use solder containing lead. Carenegie Mellon University has provided a document on safely using lead solder: